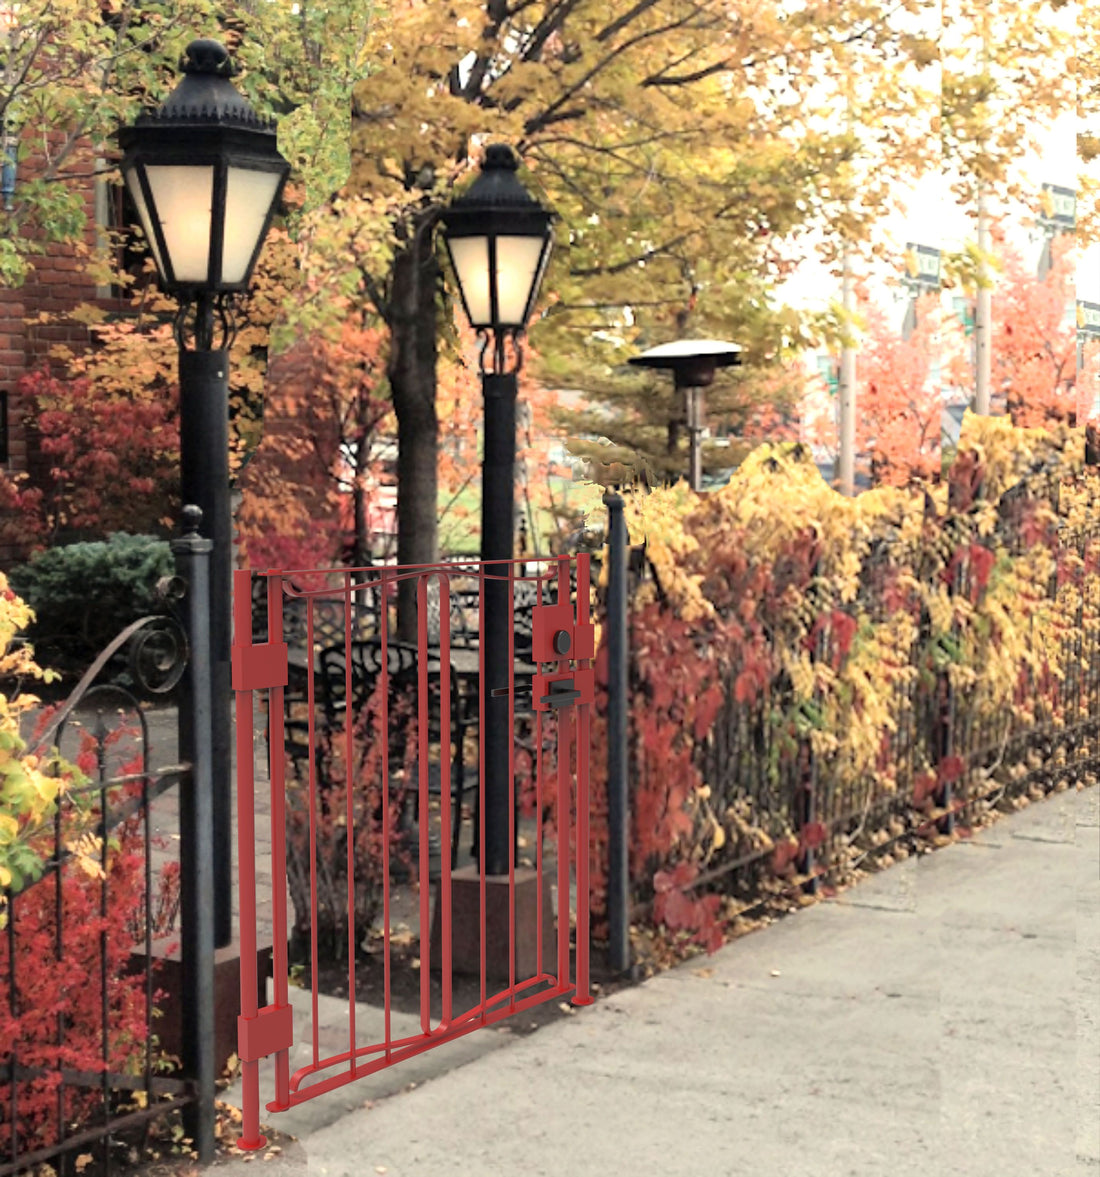
So, you just purchased your beautiful new Cascade gate and are anxious to get it up and functioning properly. Whether you are a Contractor, a tradesperson, or a savvy do-it-yourself property owner, chances are you may find yourself looking for the perfect Gate for your property or your project sooner or later. Now that you've found it at Cascade Manufacturing, your next question may be, "Can I install this?". The answer is probably yes, with a bit of help.
The Gate Installation process is broken down into five general steps:
- Marking exactly where the Gate will be placed.
- Creating a structural base to support the gate posts.
- Installing the posts and "hanging" the Gate
- Adjusting or "tuning" the function and alignment of the Gate
- Finalizing the gates' structural alignment
As you may expect, gates come in a wide variety of shapes and styles, as do each of their components. Besides the Gate itself, the first components we must examine are the Posts and the hinges. Your post may consist of a single pole with enough extra length to anchor it to the ground, but for the sake of this article's instruction, let's assume that you are working with a Steel post that has a fixed or welded base plate on one end and that this plate has 4 bolt holes. This is an install-friendly and stable post design. As for the hinges, in some cases, a gate hinge can be separated into 2 halves: one half remains on the Gate while the other half will remain on the gate post. This is accomplished by lifting the Gate and "hinge leaf," or hinge half off the post side of the hinge. On a security gate, it might be necessary to set the Gate to an open position (90 degrees to the post) before lifting off the hinge. For our next steps, we need to make note of the gap left between the Gate and the post when both the Gate and post are connected by the hinge in the closed position.
Step 1: Mark the placement of the Gate on the ground or surface that you will be placing it on.
This process is often referred to as "lay out". An important thing to remember is that we will need to do a lot of work to the base surface where the Gate will be placed, so after our initial marking, it is a good idea to install stakes or outside markers so that you can use strings or site lines to reestablish your layout as the installation progress.
To begin with, make a straight line representing the "plan view" or an overhead view of where the gates and posts will be set in the closed position. You should align this with dominant features such as the left and right sides of a fence, wall, or hedge that the Gate might adjoin to. Note that your Gate should be set to the face of the adjoining structures and not their center (this will allow the Gate to fully swing open before it encounters any obstructions.)
Make another cross mark at the center of the space that your Gate will occupy. From this center mark, measure over towards the hinge side of the Gate and mark your hinge post center. This measurement should represent half of the gate width, half of the post width, plus the hinge gap as described above.

Step 2: Create a structural base for the Post
Hinge posts carry a lot of offset weight and need a deep and wide footing to properly support the post as well as the weight and movement of the Gate. Latch posts, on the other side, will have to take a lot of punishment with hard closes and potential pushing from the motion of the Gate as it latches and holds its closed position. So, as you can see, the base support of the post is critical.
We start by excavating a hole in the ground. Your hole depth should be at least 45% of the Gate's height and at least 40 % of the Gate's width in diameter. The hole can be square or round. This can be done with a shovel or spade, but you might make easier work of it using a specialty two-handled digging tool known as a post-hole digger. The post-hole digger allows you to excavate the loose soil without needing as much room to do so and can be extremely useful, especially to get the hole started and brought to proper depth. You may want to make a small square frame from wooden boards to create a more uniform shape for your hole at the surface where you will see it. This frame can be suspended and set in place by tacking or screwing it onto stakes set in the ground around the hole. This is a "form".
Next, it will involve filling your hole, or "footing," with mixed concrete. Before doing that, we need to make something that will displace the concrete under the post itself, leaving enough room for watery mortar mix or "grout" that we will use later. This part of your form, known as a "buck out," can be as simple as a square piece of cut board. It should be about 3" wider than the post base plate and between 1-1/2" to 2" thick. Keep it on hand when you are pouring the concrete so that you can quickly place it before the concrete begins to firm up, immediately after "the pour."
With your buck out set aside and your cross sections of marking strings at the ready, you are ready to pour your footing. Follow the directions on your bag of ready-mix concrete to add the proper amount of water to your wheelbarrow, trough, or mixer, then pour in the dry contents of the bag. Mix the concrete thoroughly with a shovel or mixer and pour it into your form. Repeat as needed intel you have a full form. You need to maintain a wet edge, so sorry, no breaks tell your footing is done.
With the footing poured, place the buck out board in position and force, or dig it down to the pe flush to the surface. Note: this must be removed before the concrete completely sets and should incorporate some means of getting a grip on it to pull it out. A couple of screws or holes and a piece of rope should do the trick for a handle. This will form a space for grout under your post base, which is critical for accurate adjustments.

Step 3. Installing the gate post
With your dried footing in place, drop your post into the "grout pocket" that you have made and mark the four holes. Remove the post and use a" Roto hammer drill" to make four 3/8" diameter holes 3" deep. Next, use a small sledgehammer or heavy framing hammer to drive four 3/8" "wedge anchor bolts" into the holes. Be careful; only drive them deep enough to be 1" above the surface of the top of your form, do not drive them all the way into to base of the grout pocket. Once you drive them in, they cannot be removed or backed out. Place a washer and nut on each bolt and wrench them down tight with a 2-1/2" to 3" section of bolt left protruding from the concrete. The bolts will tighten in the hole as you turn on the nuts and washers.
Next, loosely place a second nut on each bolt and align the nuts' tops with the concrete's surface, leaving space underneath the grout pocket. Set your post base over the loose nuts and use a short two-foot level to check the post for plumb. Remove the post and adjust the nuts to change the angle of the post base. Repeat as necessary intel the post sets plumb with the level in two directions. Now, we have one more adjustment that will allow us to fine-tune the Gate in our next sequence. Take the 2 loose nuts that are furthest from the gate center and turn them down 2 full turns each so that they are set uniformly lower than the other two nuts under the post base. Your post is now sitting at a tilt away from the Gate. Set the hinge post over the nuts and use a 3rd set of nuts on each bolt to loosely secure the base plate.
Step 4: Hanging and Adjusting the Gate
Set the Gate on top of the hinges and use a couple of weighted bags or steaks to temporarily prevent it from opening or closing. You want it retained in the close position, but you want it to hang under its own weight. Now, slowly tighten the 2 outside nuts intel. The latch side of the Gate rises to a perfectly plumb and level position. Make minor adjustments to the nuts while checking the Gate with the level.
Step 5: Finalizing the Gate
With the Gate hanging in the correct position and under its own weight. Mix up your grout. Use a "Structural grout" mix, adding water and mixing to a "thin milkshake" consistency. The mixture should be easily portable and self-leveling (not too thick). Immediately pour the mix into the grout pocket under the post bases and ensure full contact with the bottom of the post base. Allow the grout to dry thoroughly before removing or swinging the Gate. Now, with the Gate in place, you can repeat the above steps to set the latch post. This should only be done after the Gate is fully installed in a plumb position. Use your adjustment nuts under the "latch post" to set the latch perfectly to the Gate.

This method will reliably produce a perfectly hung and safely installed gate.
Always turn to a professional or contact us at https://www.cascademanufacturing.com/ for good advice on this and other methods for installing your CascadeManufacturing.com gates in a wide variety of conditions.
You will find an amazingly elegant and reliable selection of gates At Cascade Manufacturing with completely customizable features and sizing. Our gates come with the Hardware and instructions you need for a dependable and rewarding installation every time.

Always turn to https://www.cascademanufacturing.com/ for all of your landscaping and custom-building features! Count on the strength, beauty, and elegance of a CascadeManucaturing.com Gates. Always Custom. Always Quality. Enjoy your new gate!


1 comment
I would love to know what if any perennial espiraling flowering plants thrive in the 8b
ag zone.