Houseplants are a beneficial addition to indoor spaces for many reasons. They help to filter pollutants, providing clean air for the inhabitants; they help to bolster moods and productivity; they add a pleasing aesthetic to your home’s decor. Caring for them is fairly straightforward and simple -- keep them watered, provide enough sunlight, and add a little fertilizer to their pots once in a while. Beyond those basics, it’s also important to repot them occasionally to promote optimum health and growth.
Why Should You Repot Houseplants?
There are a couple of important reasons as to why your houseplants need to be repotted periodically.
Over time, the organic material in potting soil breaks down and the nutrients originally found in the mix are completely used up. Repotting replenishes the potting soil, enhancing the root zone. Also, as plants grow their root systems grow accordingly and can become rootbound, stunting overall plant growth. Giving roots more room to branch out will result in healthier foliage growth.
When to Repot Houseplants?
A common question many homeowners ask is, “when should I repot my houseplants” and that answer isn’t cut and dried.
How often your houseplants should be re-potted depends on the type of plant and how quickly they grow, filling in the free space in the pot. Most houseplants benefit from being re-potted into a larger container with new potting soil every other year, preferably in the spring when roots are actively growing and will quickly heal and move into the new potting soil.
The best way to tell when your houseplants need to be re-potted is to watch for the following telltale signs:
- roots are growing out of the drainage holes
- the foliage isn’t growing or is growing slowly, even though the plants are being fertilized and it’s the plant’s active growing season
- roots are completely circling the rootball
- water runs right through the container and out the bottom drainage holes.
Supplies Needed to Repot Houseplants
When it comes to repotting your houseplants there are three main things you need: a bigger container, fresh potting soil, and something to use as a scoop.
A new container should be slightly larger than the previous one to allow the roots to grow and expand. Try to find containers no more than 2 inches bigger in diameter than the current one so the plant doesn’t look out of place in its new home.
Some people choose to “freshen” their used potting soil by adding organic material and fertilizer to it, while others opt to purchase new potting soil from their local garden center or big box store. Purchasing new potting soil guarantees there aren’t any diseases or insect pests hitching a ride into your containers as opposed to using older, freshened potting soil.
How to Repot Houseplants
Repotting your houseplants is a fairly straightforward process, albeit a slightly messy one. Some people choose to repot their plants outside where the mess isn’t such a concern, or they lay plastic or old newspapers down on a kitchen table or counter for easy cleanup when they’re done.
The following will walk you through the steps to follow, for successful re-potting.
1. Start off by watering your houseplant in its current container prior to starting the repotting process. This can be a few hours all the way up to the day before. Watering helps to remove the plant from the container easier and reduces the risk of shock on the plant.
2. Gather all of your supplies and set up your work area, whether it be indoors on a protected surface or outside.
3. If you are using pre-owned containers make sure to clean them well to remove any salt residue from fertilizer or old potting soil.
4. Moisten the potting soil by dumping it into a large container or bucket, adding tepid distilled or non-softened tap water until the potting soil will “clump” together when you grab and squeeze a handful.
5. Add a couple of inches of potting soil to the bottom of the container.
6. Gently remove your plant from the old container, being careful not to damage the plant or the roots. You may need to loosen it by running a table knife around the inside edge of the container.
7. Tease as much of the old potting soil from the rootball as possible.
8. If the root-ball is highly root-bound use a sterilized sharp knife or utility knife to remove some of the roots from the bottom and sides of the root-ball.
9. Place the plant in the center of the pot so the crown of the plant is about 1 inch below the rim of the container.
10. Fill the sides of the container with potting soil all the way to the top of the rootball, covering the rootball with a slight amount of soil. Leave approximately ½ inch of space between the potting soil and the rim of the container.
11. Tamp down the potting soil being careful to not compact it.
12. Water the well with distilled water to remove any air pockets that were created when adding soil to the container.
Tips & Tricks for Repotting Houseplants
● Don’t place a layer of rocks in the bottom of containers. While at one time this was thought to help drainage, it’s now understood that it actually inhibits drainage.
● Make sure new containers have drainage holes in the bottom.
● Cover drainage holes with coffee filters or paper towels to prevent potting soil from falling out.
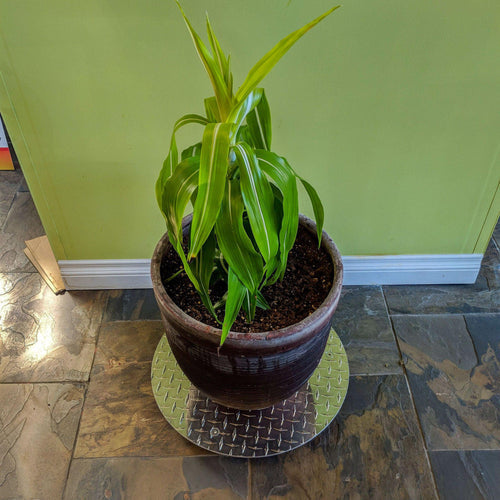
● Put large plants on heavy duty plant caddies to make moving them easier.
● Plants will undergo some shock after repotting and may appear to droop or wilt slightly, they will rebound from this
● Don’t water newly repotted houseplants for a week after repotting to allow any damaged roots to heal.
● Place repotted plants in a shadier, cooler spot for a few days to allow them to recover.
● Don’t fertilize for 6 weeks after re-potting if the potting soil contains fertilizer.
Periodically repotting your houseplants replenishes potting soil, and provides more space for the roots to grow into. Both leading towards better overall growth and health of your plants.